Micro:bit projects – Code your own ‘rock, paper, scissors’ game
Update a favourite – and help pupils learn coding skills – with this micro:bit rock, paper, scissors project…

- by Adam Knight
- Year 6 teacher at Westclyst Community Primary

This project teaches pupils how to code their micro:bits in order to play a game of rock, paper, scissors. They’ll learn to use Scratch coding blocks to program random number generators and LED displays.
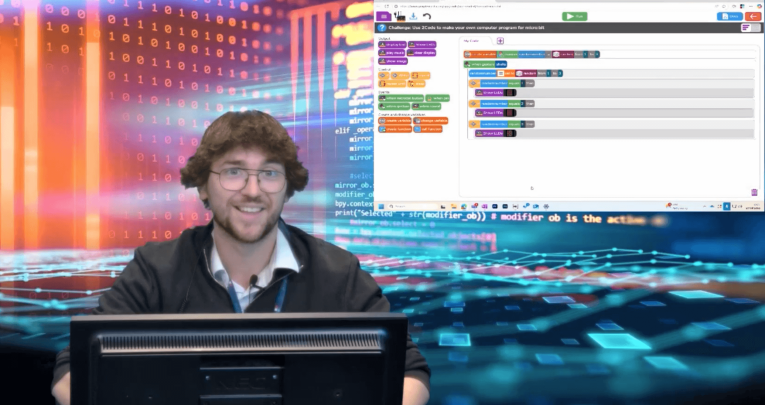
Our trust is very lucky in that we have amazing technology access. For this micro:bit project, children from across our seven schools were able to take part remotely. I filmed my teaching from our state-of-the-art TV studio.
It does not escape me that many schools don’t have this option, but this lesson will work perfectly well in-person in your classroom, as long as the children have access to micro:bits.
Start your micro:bit project here
First, I recapped on a previous coding project we’d done, using the micro:bit’s light sensors to create a nightlight.
If you have previously worked with this device, it would be worth recapping what the children remember. If you haven’t, there are plenty of good intro videos online you can use to introduce the concept.
Explain that in this lesson, you’ll be using the micro:bit to play rock, paper, scissors.
Creating a variable
Load up Scratch on laptops. Explain to the children that this is what you’ll be using to write your code. The first step is to create a variable.
To be able to play an unbiased game of rock, paper, scissors, you’ll need your variable to be a random number between one and three (since there are only three possible choices when playing the game).
Click on the ‘variables’ tool in Scratch, and support pupils to code a number generator.
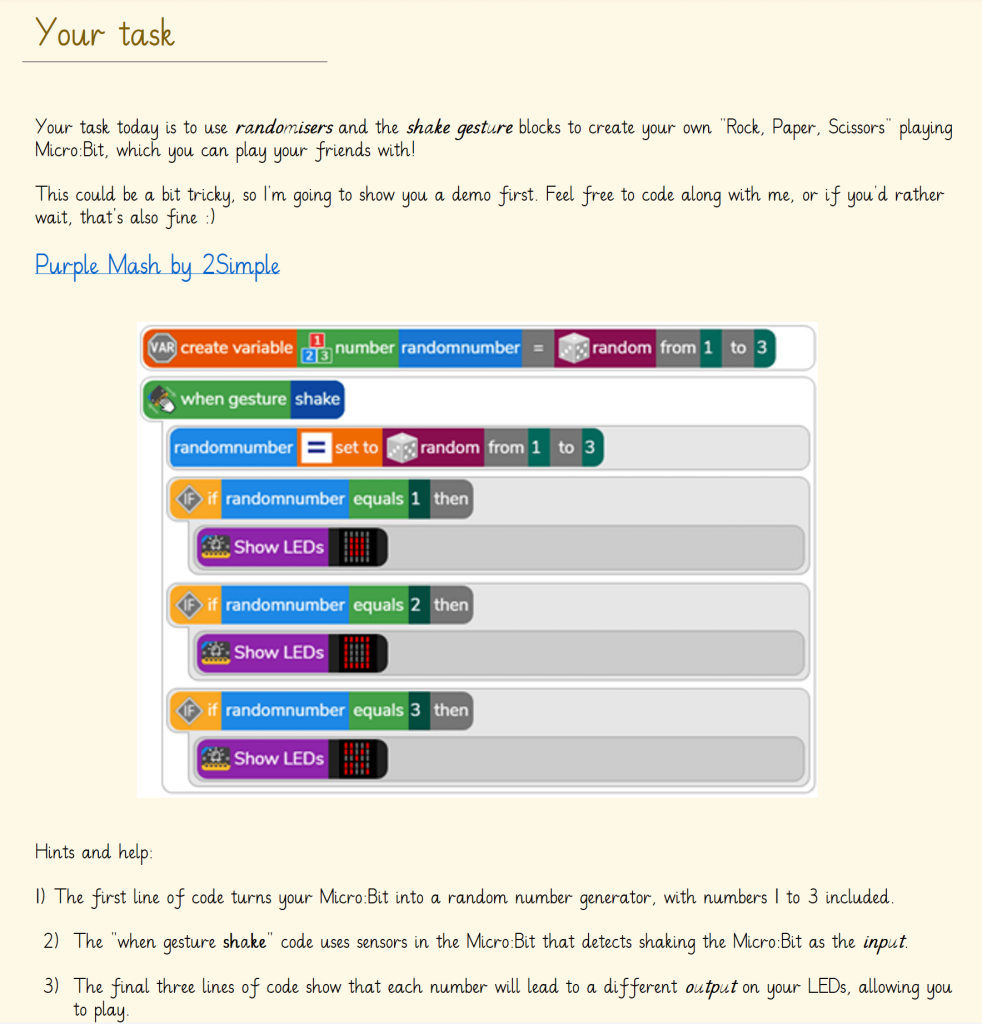
Triggering the random number generation
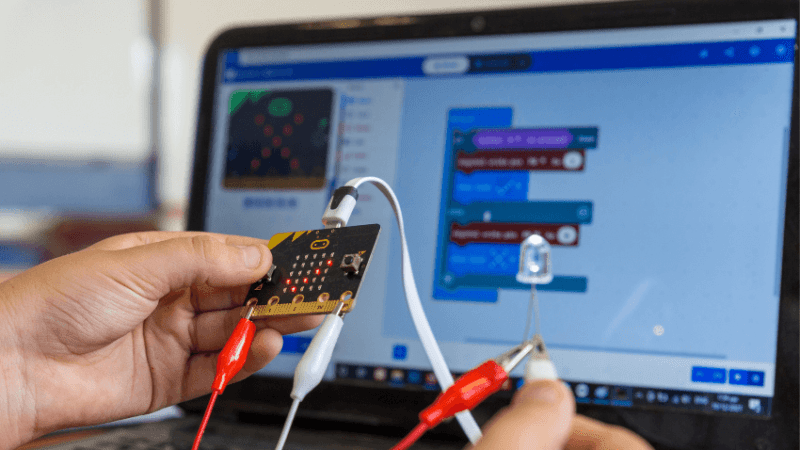
Children will now need something to trigger the random number generation. We decided to use the ‘when gesture’ and ‘shake’ blocks in Scratch to code the micro:bit to generate a number between one and three when it was shaken.
Guide pupils to use the Scratch interface to drag the coding blocks into place, and trial shaking their micro:bits to generate a number. If some pupils are finding Scratch tricky, ask them to work in small groups, mixing abilities.
Program the LED display
Next, use the ‘if:randomnumber:equals’ blocks to program the LED display on the micro:bit to show either a rock, paper, or scissors icon when a corresponding random number is generated.
We settled on one=rock; two=paper; and three=scissors, but any combination will do. Another trial-and-error session will allow pupils to test that their coding has worked. If not, look through and problem-solve to find any bugs.
Class tournament
Finally, set up a class tournament! Get groups or individuals to test out their codes to play rounds of rock, paper, scissors.
You can tie this into maths learning on probability, and discuss real-world applications for the codes you’ve created.
For example, can children think of ways people might use random number generators in the fields of gaming or cryptography? To tie into literacy skills, have children write a step-by-step guide to micro:bit rock, paper, scissors.
Adam Knight is a Year 6 teacher at Westclyst Community Primary, part of Cornerstone Academy Trust. This lesson was also featured at MATPN South West.