

KS2 science – Flower dissection step-by-step
Get hands-on with the natural world and help pupils understand different parts of the flower with this KS2 science dissection

- by Emily Hunt
- Author of the 15-Minute STEM series and freelance STEM writer Visit website
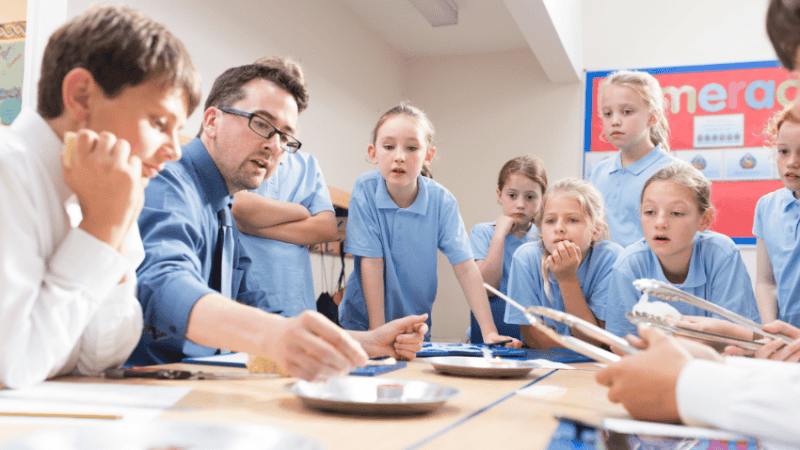
A dissection is a hands-on, fun way to get children engaging with the different parts of a flower for KS2 science lessons.
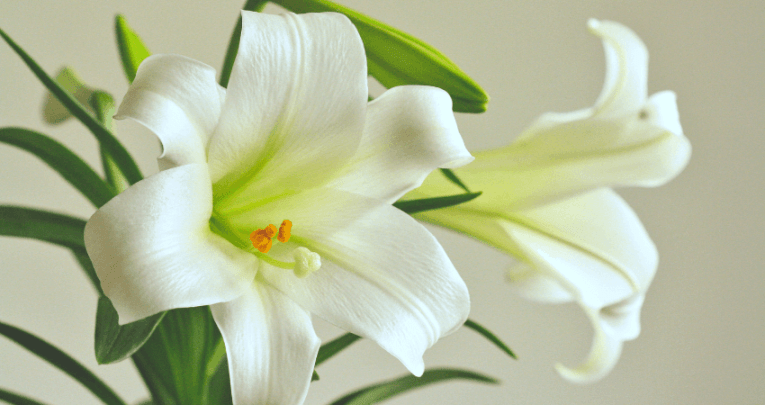
Specimens like lilies, tulips or daffodils are particularly suitable for this activity.
I find it works well for children to lay each dissected flower part onto a large piece of paper, then to label the part and its purpose underneath.
This activity is also a great way to make real-world links to different jobs, such as botanists, who study plants, as well as helping to conserve and protect them.
So grab your favourite blooms and dig in!
1. Sepals and petals
Begin the flower dissection by asking the children to carefully remove the sepals and petals.
Explain that the outer parts are sepals and that they protect the flower when it is developing.
Ask them to use their magnifying glass to see if they can spot any pollen on the sepals and petals.
Then ask them to give the petals a sniff. Explain that they are fragrant to attract pollinators such as bees to the flower.
2. Stamen
Next, ask the children to carefully remove the stamen.
Explain that this contains the male reproductive parts of the flower and consist of anthers (containing pollen) and filaments (supporting stalks).
Remind them to be careful when handling the pollen because it can easily stain your clothes!
Encourage a closer look at the pollen using a magnifying glass. These tiny grains have evolved to be transported on pollinators.
3. Pistil
The children will now be left with the pistil.
Explain that this is the female reproductive part of the plant and consists of the style (the stalk) and stigma (the sticky bit at the top).
Let the children gently touch the stigma to feel how sticky it is. This is to help it catch pollen.
Ask them to use their scissors to cut the stigma open. Can they see the gap inside it?
Then ask them to look closely at the style. Can they spot the hollow path down the middle?
4. Style and stem
Now ask the children to locate the ovary at the base of the style, just above the plant stem.
Explain that pollen on the stigma travels down the hollow path inside the style and fertilises the ovules in the ovary. These fertilised ovules will develop into seeds.
Encourage the children to carefully cut the ovary in half lengthways using scissors and use their magnifying glass to take a closer look.
5. Types of flower
Finally, take the children on a nature walk outside to look at different types of flowers.
Take a closer look at each flower with magnifying glasses to see which parts they have in common. What are the similarities? What are the differences?
Challenge them to find and take photos of other flowering plants that have both male and female parts in a single flower.
Emily Hunt is an experienced primary teacher and senior leader with a passion for STEM education. She is the author of the 15-Minute STEM book series and shares STEM activities on her website HowToSTEM. Follow Emily on Twitter @HowtoSTEM