
Peer marking – Making this strategy work in primary & secondary

Getting students to improve each other’s work is the Holy Grail of assessment. But you’ve got to build the right foundations…
- by Teachwire
- Classroom expertise and free resources for teachers
For peer marking to be valuable, it needs to encourage students to properly engage with each other’s work and make considered suggestions for improvement. Here’s how to get the most from this formative assessment technique…
What is peer marking?
Peer marking is the process of students assessing each other’s work rather than handing it to the teacher.
It can be a really effective way to engage students with new ideas. It can also help them to reflect on their own work and motivate them to engage with course material more deeply.
Benefits of peer marking
A 2006 study by Sadler and Good broke down the benefits of peer assessment. It broadly summarised these benefits according to four categories:
- logistical
- pedagogical
- metacognitive
- social
Logistical benefits of peer marking
Logistically, peer marking is good for you, the teacher, because it reduces the amount of marking you need to do outside the classroom.
It’s good for the students because they can access feedback on their work immediately, whilst still in the context of the lesson.
Often, if you hand work back a week or even a few days after completion, the feedback may be too late to be effective. Peer marking, however, is dynamic and open for discussion.
Pedagogical benefits of peer marking
Pedagogically, peer marking can be empowering for students. This is because it gives them the opportunity to learn and teach, improving and developing multiple skillsets at once.
Marking another student’s work gives the assessor a new perspective. It encourages them to more closely consider their own work.
Meanwhile, judging the correctness of answers will enable them to deepen their understanding of a topic.
Metacognitive benefits of peer marking
The metacognitive benefits come from the students’ process of ‘thinking about thinking’, or even ‘learning how to learn.’
This is a critical part of schooling in the twenty-first century. Andreas Schleicher, Director for Education and Skills at the Organisation for Economic Co-operation and Development (OECD), explains it succinctly:
“A generation ago, teachers could expect that what they taught would last a lifetime. Today, because of rapid economic and social change, schools have to prepare students for jobs that have not yet been created, technologies that have not yet been invented, and problems that we don’t yet know will arrive.”
Theoretically, peer marking will give students a better understanding of marking systems which allows them to make strategic decisions for taking tests and solving problems. These are skills which are every bit as crucial as understanding the content of individual topics.
Social benefits of peer marking
Finally, the social benefits of peer marking come with the empowerment pupils feel when they are able to share in the power traditionally held by the teacher, as well the group bonding it fosters. Students build a sense of shared ownership for the learning process.
5 steps for better peer marking
Getting children to improve each other’s work is the Holy Grail of assessment. But you’ve got to build the right foundations, explains Shirley Clarke…
The following steps are the culmination of some 20 years of working with teachers to improve children’s learning through formative assessment…
1) Assign partners at random
Organise your class so that children have a new talk partner each week, selected at random. Many schools do this as a matter of course and it means that:
- Children have a chance to learn and socialise with every person in the class at some point.
- Changing partners prevents children being trapped in one role for weeks at a time. (For example, the higher achiever; the lower achiever; the helper; the confident one; the shy one, etc).
- They always have a learning partner with whom they can share strategies, talk about their writing, and discuss any questions put to the class.
Be flexible. Sometimes threes are better or you might want to pair up children differently for a particular purpose.
On the whole, however, regularly giving children a new partner at random is the best scenario for learning and developing skills.
2) Read work aloud
Emphasise that children should read aloud what they’ve written at every stage. It is when we read our writing aloud that we hear where the commas and full stops naturally fit and whether it sounds ‘right’.
Writing that’s full of wonderfully long descriptions, for instance, might look impressive on the page. However, when spoken out loud it can sound over the top – ridiculous, even.
“Emphasise that children should read aloud what they’ve written at every stage”
Encourage children to do this first on their own – quiet muttering rather than loud orating. If they go straight from a first draft to partner discussion and peer marking, it doesn’t give children the chance to do some personal editing first.
It’s also frustrating to listen to someone read aloud when they’re continually stopping to correct or change their work. It’s equally annoying for authors to be told about errors they can spot perfectly well for themselves.
3) Practise together
Model what peer marking should look like. Use the visualiser to pick one child’s writing at random, usually half way through the process. Go through the following stages: “Let’s read it through so far.” At which point you read the text aloud to the class.
“What do we really love about it and why? Talk to your learning partner…” This is a chance to share opinions and underline the best bits on the screen.
Notice that I don’t go straight to the success criteria, unless those affect the quality of the work – such as in the writing of a letter.
“Notice that I don’t go straight to the success criteria, unless those affect the quality of the work”
Saying something like, “Yes, she’s used the past tense” doesn’t help children judge the quality beyond the basic structure of the piece. Instead, focus on questions such as, “What words, phrases or sentences have the best effect? Why?”
Feelings rather than technical language
We want to concentrate on how the writing makes us feel, and how the writer achieved this, rather than on technical language.
If, for instance, we were to focus on the word ‘it’ in the opening to a piece of writing that the author intends to be scary, we might say this fires our imagination. We begin to wonder what ‘it’ might be.
Or we could highlight where the author has shown, as opposed to told, the reader how the character is feeling: “I could feel my heart pounding as I stood stock still” rather than “I was terrified”.
“Is there anything that could be even better?” This could be the choice or the position of a word, or any punctuation that would make a difference to the sound or sense of the writing, etc.
“We want to concentrate on how the writing makes us feel, and how the writer achieved this”
Ignore errors for now, unless this is a very young class at the beginning of writing. Ask children to talk to their partners, share ideas and involve the author of the piece in deciding whether to accept the improvements.
Keep reading the writing aloud to see if the suggested improvements really do improve the piece.
A more impressive adjective might seem like a good idea in theory, but in reality it might have a negative effect on the flow of the piece.
Take, for instance, ‘It was big, black and towering’. Replacing ‘big’ with a longer word might spoil the sentence by removing the alliteration and ruining the rhythm.
- If you want to implement peer marking into your classrooms, there are a few things to think about…
- Develop rubrics or marking guidelines that clearly define the tasks behind the marking process. Involve these rubrics in learning exercises so that students are able to apply them effectively.
- Consider breaking larger assessments down into smaller chunks, inviting students to peer mark at each stage.
- Lead by example. If you use a consistent marking process with constructive criticism and illustrative feedback when marking students’ work, you’re in the best place to introduce peer marking assessment into the classroom – and get the most out of it.
4) Make joint improvements
Ask partners to peer discuss their writing and work together to improve it. This is better than asking children to simply swap books, which leaves them unsupported.
The author should be the only one making marks on their work, and they should have the final say on any changes.
The role of the partner is to advise – we’re not casting them as the teacher with a licence to write comments on another child’s work. Role play how children might politely reject their partner’s suggestions.
“We’re not casting them as the teacher with a licence to write comments on another child’s work”
Skip this step and pupils often feel duty-bound to accept their partner’s ideas, even if their own thoughts were better. “Thank you. That’s made me think of an even better idea” is a good way of doing it.
Have children use two coloured pens: one to show what they deem excellent and another to highlight any improvements made.
Both pupils in a pair should write their names on their writing to make it clear they peer marked it. This, with the colours, makes the processes involved transparent to all parties.
It’s a good idea to leave one side of writing books blank. This provides a valuable space for trying out spellings, comments by the teacher and, most importantly, any improvements the author wants to make – lined up alongside the original.
Without this space, children can feel limited when it comes to making changes.
5) Check for effect
Keep coming back to the intent of the author and the impact on the reader. I used to ask my audiences to improve the following sentence by changing only the nouns and verbs: ‘The woman ate the food’.
I would get fairly predictable responses, such as ‘The queen nibbled the cake’. When I started asking them to think first of the impact they wanted to have on the reader (“Do you want them to feel horrified, disgusted, pitying, amused, shocked, excited, etc?”) their sentences were remarkably improved.
Suddenly, there were hags chewing bones and supermodels inhaling lettuce leaves. And they could work with their partner to strengthen their chosen impact still further, rather than being happy with the first attempt.
Shirley Clarke is a former primary teacher and lecturer/researcher. She is now an international freelance consultant, running courses, researching and writing. Watch a video of peer marking in action on Shirley’s website.
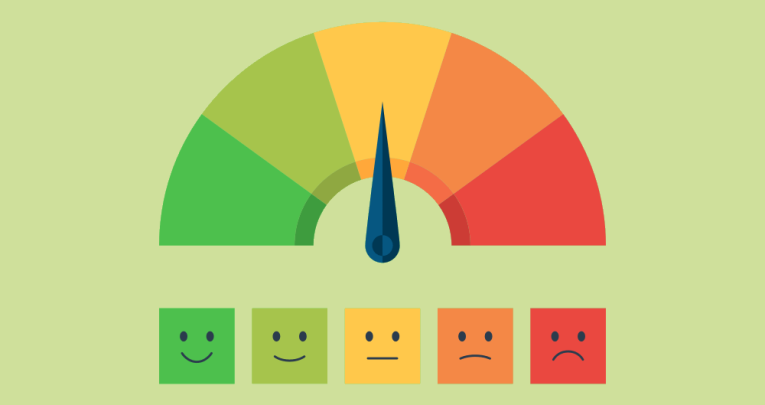
Peer marking challenges to consider
There are limitations to the benefits of peer marking. You may have concerns about implementing it yourself.
For example, you may worry that peer marking might not be as accurate – or at least as consistent – as grading done by a teacher, particularly where students are influenced by their friendships or personal relationships with their peers.
It may be that you prefer to only implement peer marking on work that can be marked objectively, such as a multiple choice quiz.
You can then use the experience to train students in thinking about how to mark, so you can later implement it in subjective assessments.
In addition, some students may be embarrassed about being marked by their peers, and would worry about their grades being known openly in the classroom.
“Some students may be embarrassed about being marked by their peers”
You can address this by protecting the name of the student whose mark is being marked, but this will limit the possibility of a useful discussion about feedback.
Generally, peer marking works best when students are paired with peers of similar abilities, and when a supportive, non-threatening atmosphere has been fostered.
Michael McGarvey has over 20 years of experience in the global education sector, and currently works as the Director of UK Education at Cambridge University Press.