Developing An Enabling Mark-Making Environment Outdoors
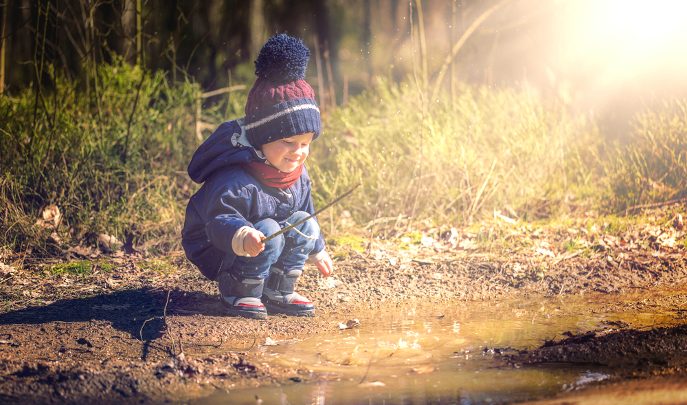
Natural environments are ideal for mark making, and for developing children’s emergent writing skills

While natural habitats may not seem obvious places for the physical act of writing or mark making, they are a rich source of stimuli.
There are multiple surfaces available from the bark of trees to smooth stones, snow and sand, and tools are created from found materials such as using charcoal left over from a fire the day before.
Many practitioners also observe that some children will write or make marks outdoors who do not choose to do this inside.
The temporary nature of outdoor surfaces is conducive to children experimenting. Changes can be made and ‘mistakes’ sorted. This gives them control of making changes and re-exploring and investigating.
When assessing mark making outside, use the same criteria for indoor work. It’s a great opportunity to observe children when they are playing to see the variety of mark-making opportunities which engage them. When planning, consider where you could make links or introduce mark-making opportunities in different activities and areas outside including role play, physical activities, construction, and so on. Larger mark-making opportunities and ones which cannot be replicated indoors are particularly useful.
Observe your children carefully and set up the outdoor area with mark-making resources aimed specifically at their needs and interests. Know what you are putting out and why. This includes the need to ensure children will have opportunities to mark make without adult supervision.
See your outdoor space and the world beyond from the eyes of a child. There needs to be plenty of inspirations, provocations and situations that facilitate children’s mark making – capturing their imaginations. Think about opportunities for fixtures and features to be used, eg:
• Earth beds and gravel pits – have big and little sticks, forks and rakes for pattern work.
• Put blackboards, mirrors, Perspex, pinboards and whiteboards on walls – at different heights and in interesting places.
• Look for magnetic opportunities outside, eg on fences, sheds, etc for adding magnetic letters and poetry.
• Use windows to draw upon with whiteboard markers or window pens. Landscapes can be traced as can friends faces through the window.
• Take rubbings of different objects in the local area as well as the designated outdoor area.
• This can help begin to develop the concept of perspective. Try rubbing gratings, grids, hydrants, tree bark, walls, paving stones, etc.
• Create dens, nooks and crannies – often they like to be out of an adult’s eye to have the freedom to mark make without it being commented upon!
• Encourage children to add labels and signs on sheds, playhouses, hooks, door handles, etc.
• Grow a range of leaves and plants for mark making opportunities – printing, writing on, hammering and using for print making (Google Hapa Zome)
• Add in pendulums and pulleys for creating mark making patterns with water.
• Remember the value of sand, mud, snow and other sensory, natural surfaces as mark-making mediums.
• Messages boards – especially useful at entrances to the outdoor space where parents collect and drop off children. Have one at child height.
• Add blackboard paint to wooden walls, stumps and other places for mark making.
• The addition of posting boxes: places to leave and retrieve messages, geocaches, little pockets, cracks in wall or places where messages can be left.
• Carefully selected examples of environmental print.
Mark making props, materials and resources
A collection of resources, placed in different zones or areas, ready for spontaneous opportunities, is needed. They should be chosen with care, organised and presented attractively. There is no need for a writing table or special mark-making area. In real life, we write in different places for different purposes. Saying that, sometimes it can be also good to have a collection of resources in one place so that children see and learn that all have a purpose for writing.
Ways of presenting mark making materials • Create a mark-making shed (visit cosydirect.com)
• Bring a trolley in and out daily.
• Put together grab ‘n’ go bags with mark making tools and portable writing surfaces available.
• Look at Lomo transparent 3-litre dry bags or Smartsack Peg bags
• Have explorer vests with lots of pockets that contain mark making materials, e.g. pocket mirror, whiteboard pen, a notebook, etc.
• Have waterproof mini containers which hold a range of interesting mark making objects, eg a roll of thin card and a pencil (visit Lomo)
• Have official mark making boxes: in sealed containers so that they can be out in all weathers (visit Lomo)
• Create writing belts or bags – with pockets containing mark making resources (visit cosydirect.com)
Have plenty of portable writing surfaces: • A variety of different sized clipboards. A3 is especially good for big writing and notices. The board is easier for children with fine motor difficulties to manage.
• A5 or A6 clip boards are great for small places where just little message, notes and marks need to be made. Have scoreboards and clipboards for games and children carrying around with them.
• Interesting pieces of paper. Show children how to roll up metre strips of paper with a secret message that can be stored in a crack in a wall or put in one’s pocket. Cut up A4 paper (clean on one side, used on the other) to create little booklets. These don’t get as soggy in wet weather and don’t flap around in windy weather.
• Traditional writing materials such as pens, pencils, paper, notebooks, post-its, envelopes, postcards and grid or squared paper can be taken outside. Use these for notes, making maps and drawing outdoors
• Slates, small whiteboards, varnished wood, small pieces of Perspex, small blackboards, mirrors, old CDs, and so on. Laminated cardboard also works as whiteboard.
• Magic whiteboard and blackboard (or sheets of plastic) which can be folded up and taken anywhere are also useful on dry days with whiteboard marker pens (magicwhiteboard.co.uk)
• Masking tape of different widths – it can be stuck to many things and written on!
• Dry and flatten leaves using a DIY flower press. Have these available for writing on.
• Grow and use fresh nasturtium and lettuce leaves for edible surfaces. Add in cocktail sticks (with care) for punching holes and mark making in different ways. Remember you can eat the messages after you have read them!
• iPad, tablets or other digital technology. Use inbuilt apps as much as possible to begin with so that children learn the basics of what is provided.
Air writing – closely linked to dance, so adding music can be fun Whilst mark making tends to focus on the dominant hand. Sometimes offer two of each sort for children to develop dexterity. • Pool noodles • Wands – sticks • Ribbons on sticks or on bands on wrists • Sparklers and ember sticks (with adult supervision) • Hoses that whistle when you swing them • Tennis ball in an old stocking – swing with hands • Scarves and lengths of different quick dry materials
Use water to paint on walls, pavements, tarmac, sand and mud • Vary the range of painting tools: paint brushes of different sizes, types and widths, rollers, pipettes, turkey basters, syringes, shaving brushes, scrubbing brushes, brooms, mops, extendable paint brushes, pump action sprays, squeezy bottles, etc.
• Use feathers collected on walks dipped in water.
• Create nature painting sticks – collect grasses and ferns firmly taped to a stick with masking tape.
• Add food colouring to the water, especially on snowy days.
• Add biodegradable washing up liquid for a bubbly effect. Use straws and blow to mark make over different surfaces.
• Use cloths for drying wet surfaces in different patterns
Create water trails and patterns • A milk bottle with a hole in the bottom where water can leak out. Children can transport these by holding.
• Attach to a piece of string or guy rope to a leaky milk bottle and hang up so it becomes a pendulum.
• Tape a leaky milk bottle to the back of a trike as a “leaky” exhaust.
• Use a hose and spray water to observe the patterns which can be made.
• Use watering cans to mark make. Have different sizes or rosette. A cheap version can be to purchase a range of water rosettes that fit on bottles of water.
Car washing – the beginnings of mark making What equipment is needed to wash cars? This can be a broader interpretation of mark making that can lead into more traditional approaches. Add in hot soapy water, special cloths, tyre scrubbers, etc. Seek advice from a car enthusiast – child or adult. Find a member of staff who is happy to have their car washed. Wash tyres and look at the different prints made by the different tyres when rolled across the playground.
Small world mark-making materials • Blackboard soft material for roadways – chalk on road patterns, parking places, train tracks and so on. • Miniature letters and envelopes, pieces of card • Small pieces of chalk • Fine-tipped pens for adding detail • Little mirrors • Miniature peg blackboards • Plastic garden labels and notes • Rocks for scratching marks on bigger stones. • Little shells as mark making tools and for rubbing into tin foil to observe patterns created. • Letters arriving from characters including imaginary ones that live outside such as fairies that children can respond to.
Den building, nooks and crannies • Range of fabrics: different colours of tarps including transparent – children can draw and paint on these. • Old large sheets: vertical and horizontally placed – bear in mind that some paint or mud won’t wash out. Get children to add masking tape lines first and then peel off once the paint/mud has dried. • A range of lines and ropes of different textures and thickness so that children develop motor skills needed to put up and/or attach materials with pegs • A range of different types of pegs so that children experience challenge and problem solving. • Box board cut into different sizes and lengths and pens for making signs. • Range of clipboards for writing on inside the dens.
Role play outside Link mark making to children’s interests such as: • Making badges for superheroes, police officers, etc. • Creating tickets for travelling • Copying ideas in books or designing own ideas on paper • Providing notebooks, clipboards and mark making tools and surfaces as part of role play. • Map making and route finding and props for creating treasure hunts.
Natural mark making • Charcoal sticks • Ash left over from fires – mix with a little water • Clay and mud of different consistencies • Wet and dry sand: dry is good for pouring and patterns on wet sand. • Chalk: big fat sticks tend to work better outside • Stones for writing on slate • Varnished wooden slates • A variety of lengths and widths of twigs and sticks • Dandelion stems – he milky sap from the stem turns brown when exposed to sunlight • Experiment with different flowers and plants for creating coloured water • Branches and brashings (branches with the leaves left on) – dip into mud and water and see • the prints made or trail along the ground. • Rub berries onto cotton and see the marks made and colours created. • Happa Zome – hammering plants placed between calico cotton sheets. • Use gathered natural resources for dipping in mud, water, sand, snow etc and seeing the marks and patterns made. • Roll out clay or mud – make make worms and blobs to stick on surfaces such as walls or the barks of trees. Decorate with weeds and leaves and other found materials.
Mark making in all weathers
The weather and natural environment can add to the mark making opportunities:
• Footprints in snow, mud, sand, etc. Can children recognise their own foot or boot print and is it the same or different to their friends? Have fun making trails for each other to follow.
• Making snow angels with our bodies. Once the initial imprint is made, the children may want to further decorate this with found materials and patterns made with fingers or sticks or shells. Remember sand angels can be created on beaches.
• Swirls and patterns in water with sticks. Look at the ripples of drops and how the water responds to the movements we make. Make disappearing messages or symbols by “writing” in the water.
• Leaving mirror tiles in water out over night in frosty weather and seeing the effect as they melt. What happens when you move your finger over the melting surface?
• Draw round objects. Outdoors these can be big or small such as bread crates or logs. Use chalk, water, paint, etc. Lift up and observe the image you have created.
• Take sticks on walks and use for drawing, making messages, dragging along the ground, poking in puddles and dirt.
• Collect leaves and other natural materials outside to rub over, spray over or print with – inside or out. Observe the imprints you have made and try matching to the leaf or object.
• In winter press objects into the snow, lift them up and see the pattern they make. Paint the outline with coloured water (use a few drops of food colouring in water). Talk about the size of the objects and how much space they take up on the ground.
• Freeze lolly sticks and ice cubes made with food colouring added to the water. These can be used outside on snow, or paper to rub and see the colour leave a mark.
Juliet Robertson is an Education consultant specialising in outdoor learning and play at Creative Star Learning, and is also an author.
Her book Dirty Teaching: A Beginner’s Guide to Learning Outdoors was an Amazon Education Bestseller in 2014 and The People’s Book Award Finalist in 2015.
Her latest book, Messy Maths: An Outdoor, Playful Approach is available to pre-order. Publication date set for end of May 2017.